Thursday, January 27, 2011

A Base Class for Entity Framework based Data Access Repositories

While building a personal project which used Entity Framework, I wrote lots of little helpful pieces of code (as you do) to help me do common things.  One of them was a Repository base class that I used to manage object creation and disposal of my DbContext instances.

If we look at the DbContext class definition, we can see that it implements the IDisposable interface:


This signifies that we should dispose of our instances when we have finished using them.

In my application I decided to push both creation of the DbContext instances and their disposal down into a common base Repository class.  I then implemented IDisposable so that my container (Autofac) could effectively handle the lifetime management for me.

In the end, this is what my base Repository class looked like:
public class RepositoryBase : IDisposable
{
    protected readonly VideoLibrary db = null;

    public RepositoryBase(string connectionString)
    {
        Guard.ArgumentNotNullOrEmpty(connectionString, "connectionString");
        this.db = new VideoLibrary(connectionString);
    }

    public void Dispose()
    {
        Dispose(true);
        GC.SuppressFinalize(this);
    }
        

    protected virtual void Dispose(bool disposing)
    {
        if (disposing) 
        {
            if (db != null)
            {
                db.Dispose();
            }
        }
    }
}
In the example code shown here, the VideoLibrary is my application's DbContext class.

Sitting above this repository base class are all of my specific Repositories.  Having the db instance managed by the base class keeps my actual repository code clean as I simply reference what I need off of a "live" db instance.  An example can be seen here in a snippet of my TagsRepository:
public class TagsRepository : RepositoryBase, ITagsRepository
{
    public TagsRepository(string connectionString) : base(connectionString) { }

    public Tag GetTag(int tagId)
    {
        return db.Tags.Where(s => s.Id == tagId).FirstOrDefault();
    }
}
The alternative to doing this would have been to configure Autofac to lazily create the DbContext instances outside of the repositories and inject them in, but I opted for this method as I felt that it simplified the overall structure of my code.

Thursday, January 13, 2011

Designing ASP.NET MVC Routes for a Tag-based application

I've written a couple of posts this week to describe problems that I've tackled in developing a new web application that I'm building for personal use:

As you can probably tell from these titles, the application that I'm developing is centered around the principle of tag-based metadata.  One of the important features in this application is that I want users to be able to use multiple tags to narrow results - similar to how Delicious does it.  For example, the following URL will return MVC articles written by 'The Gu':
http://www.delicious.com/tag/aspnetmvc+scottgu
I wanted to have a similar experience and so I factored this in when I sat down to design my URL routing scheme.  In the initial cut, I identified the following routes:

Path
Details
/groupADisplays all data for "Group A"
/groupA/cricketDisplays all data tagged as 'cricket' for "Group A"
/groupA/cricket+battingDisplays all data tagged as 'cricket' and 'batting' for "Group A"
/tags/cricketDisplays all data tagged as 'cricket' from any Group

Based on these requirements, I decided to implement the following two actions:
ContentController.Group(string groupName, IEnumerable tagValues) ;
ContentController.Tags(IEnumerable tagValues) ;
And I wired those up by using the following Routing configuration:
routes.MapRoute("1", "tags/{tagValues}", new { controller = "Content", action = "Tags" });
routes.MapRoute("2", "{groupName}/{tagValues}", new { controller = "Content", action = "Group", tagValues = ""});
So now, when users enter the URL's that I have in my example table above, they will successfully be routed to the correct Controller Action's, but there's still one step to go before it will work as desired.  As things currently stand, if the user passes through multiple tag values to one of these actions, they will be received only as a single value and we will have to parse them into their separate tag values.  For convenience, it would better if that parsing had already occurred and we could work direct with the individual tags by the time they reached our controller Actions.

The trick is of course to combine what I showed in the previous article and to implement a custom ActionFilter on the controller.  In this case, the custom ActionFilter will look like this:
public class TagValuesFilterAttribute : ActionFilterAttribute
{
    public override void OnActionExecuting(ActionExecutingContext filterContext)
    {
        if (filterContext.RouteData.Values["tagValues"] == null)
            return;

        var list = new List<string>();
        var tagValues = filterContext.RouteData.Values["tagValues"].ToString()
            .Split("+".ToCharArray(), StringSplitOptions.RemoveEmptyEntries);

        foreach (var tagValue in tagValues)
        {
            list.Add(tagValue);
        }
        filterContext.ActionParameters["tagValues"] = list;
    }
}
And now all that is left is to simply apply that attribute to the ContentController like so:
[TagValuesFilter]
public class ActivitiesController : Controller
Now every request will be correctly routed through to the right controller Action's and the tag values will be already nicely split out for us, making the handling code nice and simple and free of any parsing code.

Wednesday, January 12, 2011

Efficiently binding values in your custom ASP.NET MVC ModelBinder

The other day I wrote an article describing some scenarios where you might need to create your own custom model binder to ensure that request data is properly bound to control action parameters.  The canonical example that I showed was when one of the fields that you are posting contains data that you want mapped into an array.

As mentioned in my previous article, creating a custom ModelBinder is a piece of cake.  You simply implement an interface and then write your own implementation of a method.  A template might look something like this:
public class YourCustomModelBinder : IModelBinder
{

    public object BindModel(ControllerContext controllerContext, ModelBindingContext bindingContext)
    {
        var modelToBind = new YourCustomViewModel() ;

        /// implementation goes here

        return modelToBind ;
    }
}
In your implementation code, you could read values out of the controllerContext and bind them to your object like so:
var integers = controllerContext.HttpContext.Request.Form["integers"]
Typically when you create a custom ModelBinder, it is only created to coerce the values of 1 or 2 specific properties.  In other words, generally, most of the desired binding behavior can still be met by the default binders in ASP.NET MVC.  Park that thought!

If you also remember from the previous article, when we register a custom ModelBinder, we do so using the following registration code in App_Start:
ModelBinders.Binders[typeof(YourCustomViewModel)] = new YourCustomViewModelBinder();
So from seeing this, we can determine that ASP.NET MVC already knows information about the base type that we are wishing to construct; in this case, that type is of type "YourCustomViewModel".

Given what we know:

  1. ASP.NET MVC knows what type we want to create based on our controller context
  2. The default model binder could handle most of the binding for us
We can rewrite our first implementation to use the following code:
public class YourCustomModelBinder : IModelBinder
{

    public object BindModel(ControllerContext controllerContext, ModelBindingContext bindingContext)
    {
        var model = ModelBinders.Binders.DefaultBinder.BindModel(controllerContext, bindingContext) as YourCustomViewModel;

        /// implementation goes here

        return model ;
    }
}
You can see in the line of code that has changed that I've used the DefaultBinder to bind all of the values it can and to return them to me in an object which is of the type that we are expecting.

Using the second approach means that I only have to wire-up an implementation for the properties that the default binders cannot provide.  For large, custom view models, this can save a lot of unnecessary binding code for mapping things such as simple Dates, Integers, Strings, etc.

Further Reading:

  • There's lots of links to articles about this topic here.

Friday, January 7, 2011

Pass an Array of Integers to a Controller Action in ASP.NET MVC

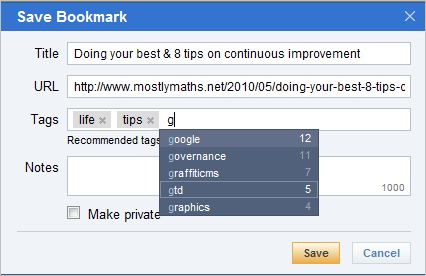
Yesterday I blogged about a little widget that I had built to allow users to tag content.  In that example, the users build up lists of tags using an Ajax interface.  Behind the scenes, we need to keep track of whatever tags the user has selected and send them off to the server for saving when the user submits their page.

When I was developing this widget, I stored the values in a hidden field similar to this:

<input type=”hidden” name=”selectedTagIds” value=”1,2,3,4,5” />

And I created a controller action like so to receive the Id’s:

[HttpPost]
public ActionResult Index(IEnumerable<int> integers)
{
    // do something with integers here
    return View();
}

When I ran that example, the value of the parameter named integers was empty – even though I was populating my hidden field with values.  So I switched the Type of the parameter from IEnumerable<int> to string and then I saw that the values from my hidden field were passed successfully.

The reason that ASP.NET MVC doesn’t do the conversion for us has to do with the the behavior of the default model binders.  Model binders are the piece of magic that parse Request values and do their best to form them into strongly typed objects for us.

At that point I could easily split the string into an array and parse the array of strings into integers and read them into some model.  You can see an example of what the code for that would look like in the following blog article:

How to post values to the server that are not in an input element

The issue here is that, for every time that I want to do this, I need to repeat that code over and over again.  Thankfully, ASP.NET MVC comes with some extensibility points that allow us to solve this problem in an elegant yet simple manner.

The two methods that we have to choose from here are:

  1. Create a custom ModelBinder and do the custom parsing into a strongly-typed object model and then pass that model as the parameter of our controller action.
  2. Create a custom ActionFilter and do the custom parsing directly into the parameter of our controller action.

For the purposes of completeness, I’ll show both ways in this article.

Creating a Custom ModelBinder

Imagine that the data that we are passing will be part of a custom view model type and we want to map the array of integers into one of the properties of that object.  Picture that the custom view model looks similar to this (but with other properties):

public class IndexViewModel
{
    public List<int> Integers { get; set; }
}

And that we are passing our data to an Action method which looks like so:

[HttpPost]
public ActionResult Index(IndexViewModel model)
{
    // do something with model.Integers;
    return View(model);
}

To accomplish this feat, we will create a class which implements the IModelBinder interface and it’s within the BindModel method of that interface that we’ll place our logic.  The implementation of the custom model binder is relatively straightforward and looks like so:

public class IndexViewModelBinder : IModelBinder
{

    public object BindModel(ControllerContext controllerContext, ModelBindingContext bindingContext)
    {
        var model = new IndexViewModel();
        var integers = controllerContext.HttpContext.Request.Form["integers"]
            .Split(",".ToCharArray(), StringSplitOptions.RemoveEmptyEntries);

        foreach (var integer in integers)
        {
            int tmp;
            if (int.TryParse(integer, out tmp))
            {
                model.Integers.Add(tmp);
            }
        }
        return model;
    }
}

As you can see, we’ve basically taken the code that would previously have been inside our Action method and moved it out into this class.

To get this working there’s one final piece of implementation and that is that we need to register our custom ModelBinder with ASP.NET MVC so that, whenever it encounters an IndexViewModel parameter, it knows to hand off the responsibility for doing the binding to our implementation.  This is also straightforward and requires a single line of code to be placed in App_Start in our Global.cs file:

ModelBinders.Binders[typeof(IndexViewModel)] = new IndexViewModelBinder();

That’s it!  Now when the sample is run, our custom ModelBinder intercepts the request, creates an instance of the IndexViewModel, which is then handed to the ActionMethod, simple!

Creating a Custom ActionFilter

The next way to perform this feat is through a custom ActionFilter.  The concept is identical in that we are writing some code that will intercept the Request and convert the Request Form values into some typed object of our choosing. 

The benefit of this approach – over the custom ModelBinder – is that, if you can get away with it, you can create a more generic solution.  For example, we can create a custom ActionFilter which converts from string to IEnumerable<int> and we can then use that filter whenever we are passing a collection of integers to an Action method.  If we are always wanting to pass custom ViewModel ‘objects’, then custom ModelBinder’s are the way to go.

Creating the custom ActionFilter is almost identical to the ModelBinder approach however this time we are inheriting from the base ActionFilterAttribute class.  Other than that, the code is almost exactly the same.  Here is the implementation of a custom ActionFilter to convert Request parameters into IEnumerable<int>:

public class IntegerArrayFilterAttribute : ActionFilterAttribute
{
    public string ParameterName { get; set; }
       
    public override void OnActionExecuting(ActionExecutingContext filterContext)
    {
        var list = new List<int>();
        var integers = filterContext.HttpContext.Request.Form["integers"]
            .Split(",".ToCharArray(), StringSplitOptions.RemoveEmptyEntries);

        foreach (var integer in integers)
        {
            int tmp;
            if (int.TryParse(integer, out tmp))
            {
                list.Add(tmp);
            }
        }
        filterContext.ActionParameters[ParameterName] = list;
    }
}

Other than using a different base class, the main difference is that we are accessing the HttpRequest through a different object and that we must directly assign the ActionParameter value at the end.

Finally, to consume our custom FilterAttribute we simply apply an attribute to our Action method like so:

[HttpPost, IntegerArrayFilter(ParameterName="integers")]
public ActionResult Index2(IEnumerable<int> integers)
{
    var count = integers.Count();
    return View();
}

Again, very simple stuff indeed.  As mentioned previously, the benefit of this approach is that we can now reuse our custom IntegerArrayFilter wherever we have this requirement and hence the possibility of code reuse is much greater.

Enjoy!

Create a 'delicious' user interface for entering tags using ASP.NET MVC Razor and jQuery

Download the code for this article:


The metaphor for tagging data has become ubiquitous on the web and is now one of the most common ways of allowing users to categorize information. Once information is tagged, those tags are consumed in a variety of ways including search, tag clouds, and flat lists of tags. Of all the web sites that I've used, the one that does tagging the best in my opinion is Delicious. The following image shows entry field for entering tags when adding a new link on Delicious:


In this article I will show you how to create a similar data entry experience to this using ASP.NET MVC and the jQuery.UI autocomplete component.   The features of our entry field will be as follows:
As you can see in the above image, the user can type to get an autocomplete listing of tags, and then click to select from the autocomplete list.  There's a couple of little tricks at play here which are:

  • The appearance of the input box seems to indicate that images of selected tags are held inside the input box that is used to type into.
  • The autocomplete listing itself. 
Creating the structure of our Tag Entry UI

First things first, let's look at how to create the appearance that selected tags are being stored within the text box.  What's going on here is that, what appears to be an input field, is actually just an outer Div element with a gray border.  Held inside of that Div element is an unordered list which, in the case of the "People" tag entry field shown above, contains the following structure:
<div id="tagInputContainer">
  <ul>
    <li><em class="tagName">Bjorn Borg</em><span class="rm"></span></li>
    <li><em class="tagName">Boris Becker</em><span class="rm"></span></li>
    <li id="tagInputListItem"><input class="tagInput" id="tagInput" /></li>
  </ul>
</div>

He we can see that the actual input element is the last child of an unordered list which is held within a Div.  What happens is that, as the user selects another tag, a new list item is dynamically inserted into the unordered list at an index position immediately before the list item which contains the input element.  The rest of the illusion is achieved through the magic of CSS. 

The jQuery for the node insertion is relatively straightforward.  We handle an event, and then insert a new list element immediately before the element with the id of 'tagInputListItem' like so:
$('#tagInputListItem').before(
                '<li class="tag" id="container_' + ui.item.value + '"><a><em class="tagName">' + ui.item.name + '</em><span class="rm" id="' + ui.item.value + '"></span></a></li>'
                );
 
You can see that there are some dynamic values being created for the id of the list item and the id of the span that hosts the remove icon and also for the em data.  We will get to this shortly and explain what ui.item actually is when we discuss how to create the autocomplete functionality.  For now, let's finish going through our layout template for the tag entry field.


When the user clicks on the span with the class of 'rm', we will want to remove the entire list item that contains it from the DOM.  Again, this is easily accomplished with some relatively simple jQuery code:
$('#tagInputContainer).click(function (event) {
    if ($(event.target).is('span')) {
        $('#container_' + event.target.id).remove();
    }
});
 Because the elements that we want to bind to are not created when the document is first loaded, we can use event bubbling to bind to events on the outer container (#tagInputContainer) and then do our DOM manipulation from there.  


Implementing Autocomplete with jQuery.UI
Now that the structure for our user interface is understood, let's look at how to implement the autocomplete behavior using the jQuery.UI autocomplete component.  In this example, we will create a client side array of data as the source of our lookup data, but using the jQuery.UI component, it is just as simple to do Ajax-style lookups dynamically from the server if you have lots of data.  In this example, lets create a small array of objects to store our data like so:

var peopleDb = [
    { value: "Andre_Agassi", name: "Andre Agassi" },
    { value: "Arthur_Ashe", name: "Arthur Ashe" },
    { value: "Boris_Becker", name: "Boris Becker" },
    { value: "Bjorn_Borg", name: "Björn Borg" },
    { value: "Kent_Carlsson", name: "Kent Carlsson" },
    { value: "Pat_Cash", name: "Pat Cash" },
    { value: "Jimmy_Connors", name: "Jimmy Connors" }
];

The idea is that when the user types into the text box, it will look up the names of entries in this list, and return any matches.  In our HTML above, the input element that we want to add autocomplete behavior to has an ID of 'tagInput', and so we bind the jQuery component to that element using the following syntax:
$("#tagInput").autocomplete({

    minLength: 0,
    source: peopleDb,

    focus: function (event, ui) {
        $("#tagInput").val(ui.item.name);
        return false;
    },

    select: function (event, ui) {
        $('#tagInputListItem').before(
            '<li class="newTagItem" id="container_' + ui.item.value + '"><a><em class="tagName">' + ui.item.name + '</em><span class="rm" id="' + ui.item.value + '"></span></a></li>'
        );
    },

    close: function (event, ui) {
        $("#tagInput").val("");
    },

    width: 200
});
You can see the important parts of the code that I've highlighted show that we:

  1. Added the .autocomplete behaviour to the #tagInput element
  2. Configured the following properties of the autocomplete component: minLength, source, width
  3. Bound to the following events of the  autocomplete component: focus, select, and close

The properties are pretty straightforward and are well explained documentation on the jQuery.UI web site.  I will briefly explain what's happening in our event handling code though.

  • Focus:  The focus event fires when the user places their cursor over an item in the autocomplete list.  We are simply taking this value and displaying it in the text box to indicate the possible selection value. 
  • Select:  The select event fires when an item is selected from the autocomplete list.  In our handling code, we are taking the value of the selected item (ui.item.value and ui.item.name) and using them to inject a new list item into the list, immediately before the node with an ID of 'tagListInputItem'.
  • Close:  The close event fires whenever the autocomplete list is closed; this happens either when the user moves their mouse away from the list, or when they have selected an item from it.  At this time we are simply removing the value from the text box to indicate that there is no data waiting to be selected.

That's pretty much it.  The remainder of the solution involves creating the CSS styles to make the control work visually.  At the top of this article is a link to a working example of the solution which contains an actual working stylesheet, but the most important visual tricks to implement are:

  1. Remove the border color from the input element so that it is not visible
  2. Add a border color to the outer DIV element to give the appearance that it is an input element
  3. Add an image to the SPAN element so that it looks like a close button
  4. Style the tag list items so they look like tags
Enjoy!


Other useful related articles: